Get started
v0.0.3
Mishka CMS Migration is an extension of Mishka CMS that moves a WordPress site into a Mishka CMS site. You work in the admin: you describe where the content comes from, run a dry run that shows what would happen, decide the few things the import cannot settle alone, and then import.
What it moves
- Posts, categories, tags, authors and comments, written into Mishka Blog.
- Pages, with the layouts of Elementor, and the site's menus.
- Pictures and files into the Media library.
- The site's title, logo and icon, and the global colours and fonts of an Elementor site as a stylesheet.
- The addresses of the site. Posts, categories, tags and pages are served at their WordPress addresses, and every address that moved is redirected.
The source is a WordPress site read over its REST API, or the file that WordPress makes under Tools, Export. Both read Polylang and WPML translations, and the export file carries every translation.
The import writes every record through the CMS's own actions, as the admin who pressed Import. The CMS's permissions and validations decide what is accepted, and the CMS's other plugins react as they do to any change.
Before you begin
- A Mishka CMS site with the migration extension set up on it. See Install the migration extension.
- An admin account with the
admin:dashboard:migrationpermission. It also needs the permission to write each kind it brings, such asadmin:dashboard:blog:postfor posts. See Permissions and plugin events. - For a REST import, a WordPress administrator and an application password. For a file import, the export file with All content chosen.
Posts, categories, tags, authors and comments need Mishka Blog on the same site. Without it, those items wait with the reason Mishka Blog is not installed.
Move your first site
- Start a run: press New import and answer the four steps of the window. The dry run starts by itself.
- Read the dry run: open the run's details and check what it found.
- Settle what needs your decision on the run's Items page.
- Press Run again, then Import.
A dry run writes nothing, so you can repeat it as often as you like.
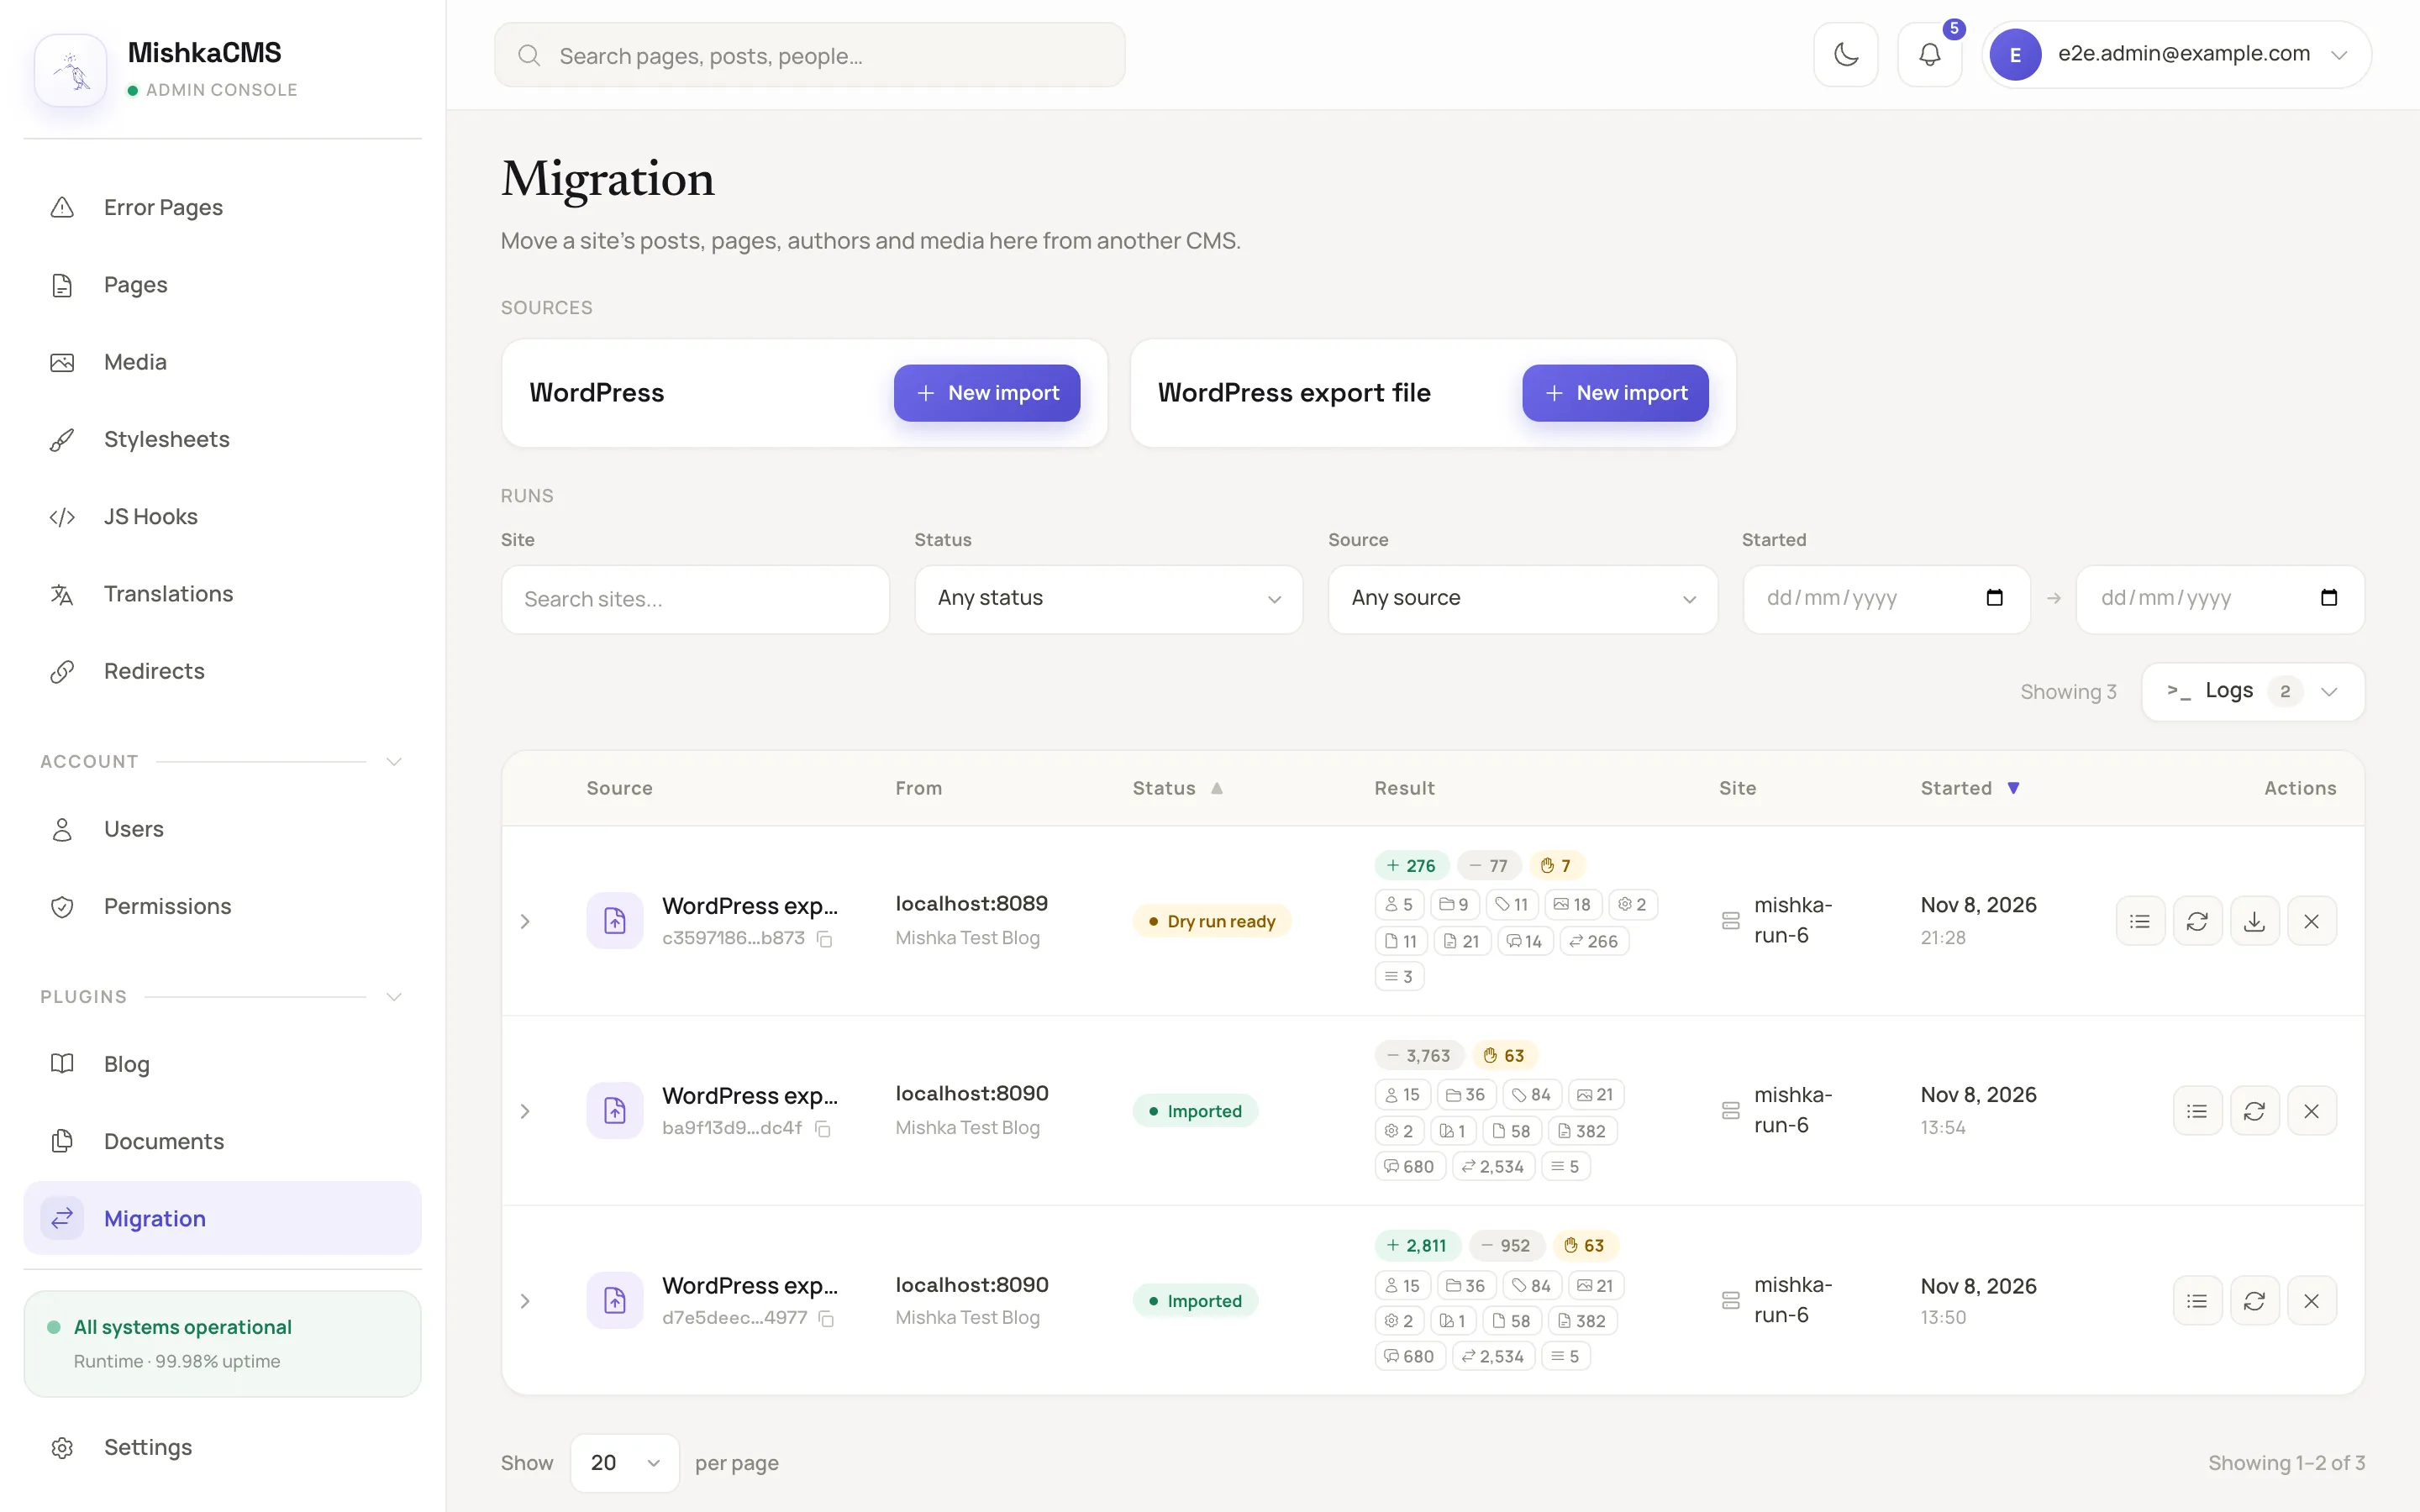
The Migration page lists the sources you can start from and the runs of the site.